
It’s no secret that I’ve really enjoyed the Splatoon series a lot. I’ve reviewed the original game, the current game, and its downloadable expansion pack already. But I’ve been playing the game regularly since getting my Nintendo Switch. And the fun I’ve had with it over that time has led me to wanting to write a little something more about it. True, there are full-fledged guides you can find out there from the Prima guide that launched alongside the game to Nintendo’s *Splat*-egy guide. A guide they include if you’re fortunate enough to find either the Starter Edition or the Starter Pack version of the retail release. (The former also includes stickers.).
With this in mind, one might wonder why I’d even bother attempting to write my own article when these in-depth books are out there. Especially considering that I am not a professional level player who has been on a competitive team winning tournaments, and getting paid to do so. While this is also true, I have been in a competitively minded group in the past. I was in the Maximum Carnage clan in the heyday of Unreal Tournament 2004. While Splatoon, and Unreal Tournament are quite different competitive shooters, there are some parallels. Both are fast paced, and frantic. Both offer multiple modes, and both require a mastery of their respective weapon line up. And with Nintendo’s recent free demo push, some newcomers may just stumble upon this.

For the purpose of brevity I’ll be keeping the focus of this article on the competitive multiplayer. So there won’t be a walk through of the campaign, the expansion pack campaign or the Salmon Run cooperative horde mode. I will say however that completing the campaigns are even beneficial to those whom prefer the multiplayer. Clearing the campaigns unlocks aesthetically alternate gear you might want to flash around. If you’ved purchased, and cleared the DLC even via the simplest means you can choose to play online as a Octoling. The mainline campaign also has tickets hidden throughout itself. Find these, and you can use them for temporary buffs at Crusty Sean’s (The food truck in the plaza.). Clearing the campaign also means The Squid Sisters can prattle off multiplayer stats to you.
The plaza is also going to be very important as it has all of the shops you’ll need to visit to unlock weapons, and gear. It also has the Street Urchin named Murch whom you’ll need to visit from time to time. When you first start playing online you won’t have access to these right away. You’ll be armed with a Splattershot Jr., a Splat Bomb, and you’ll have your Ink Armor special.
The weapons in Splatoon 2 are broken up into a few categories. Each of which come as a *kit*. You’ll have the primary weapon which is the general gun you’ve selected. Then a sub weapon which is usually an explosive, though sometimes it will be a utility like a water sprinkler or a radar dish. Each kit also gives you a special weapon. These are powerful weapons, moves, or perks you can employ after filling a meter by painting floors, and killing opponents. Some of these are moves like the Splashdown, where you can jump up like WWE Superstar Roman Reigns, and punch the ground. Which will cause a massive blast of ink to appear, killing enemies in its wake. Or the Ink Strike, a weapon that can target enemies, and fire a wave of ink based missiles after them.
Weapon categories consist of a few main groups. First are Blasters. Blasters are the game’s equivalent to rifles, and machine guns. These can give decent coverage while inking, and a respectable dose of damage. There are a couple of them that are exceptions, but by, and large they’re going to be for those comfortable with faster firing weapons.
Sloshers are the first of two categories that kind of feel like shotgun equivalents. They’re basically buckets, or variants of the bucket. A few of them like the Explosher, and Sloshing Machine are based off of the look of a washing machine. Most of these weapons perform insanely well at close range, with a few being ideal at medium range. The Explosher can actually be used long-range, and can almost be compared with a grenade launcher as it can lob a blob of ink a great distance. No matter the case, these also give you a fairly wide coverage when inking floors, and so they can serve a great purpose in either painting or combat.
Rollers are a popular choice as they can be very instrumental in quickly claiming territory. They’re also a high damage line of weapons. You can run right into enemies, and take them out. Fans of stealth kills will want to go with one. Alternatively there are also brushes which can be used the same way. Brushes are also fairly great melee range options as they can dole out high damage when standing toe to toe with an opponent. The brushes don’t have the same fast coverage as the rollers generally. But they do allow for some fast path creation.
Chargers are a great option for those who enjoy the Sniper class in other shooters. These are long range weapons that lie down a fairly long line of coverage on the way to a target. They have a slow rate of fire though, and many of them have laser scopes. So you have to be able to lead targets properly. You’ll also want to master some movement techniques in the event you’re the last one in the group, and you’re spotted. You can repeatedly fire them for some short-range action too, but they lose a bit of power. Still, these can be a beneficial choice in a tight-knit squad. Especially during ranked modes.
Splattlings are basically the chain guns of the game. They have rotating barrels, and fire copious amounts of ink in a wide-spread in a short amount of time. They also tend to run low on ink quickly, so there is a bit of a trade-off. That said, they’re an excellent way for players to give cover while teammates go for the goal. They’re also a great choice for defensive players who like to cover choke points, or their own bases. They do a high rate of damage too, making them formidable in the hands of a skilled opponent.
Splatoon 2 also introduced the Dualies class of weapons. These work like automatic pistols like Uzis in military themed shooters. They have a high rate of fire, and allow the player to do a roll dodge while using them. This combination makes anybody who uses them much harder to hit. They might not be as potent as the Blasters, but they are as dangerous as the stick, and move approach allows them to hit, and run effectively.
Finally, there are the Umbrellas which are the other Shotgun weapons. At point-blank range they are very powerful, and they have the added benefit of shielding you from enemy fire by opening them. These aren’t permanent shields mind you. After taking so many hits they’ll be temporarily disabled. That said, they can be a great front line choice, as you can withstand a couple of shots, and give cover to a teammate who may follow behind. And they’re very useful in close range combat situations.

Each of these weapon classes has an entry that can be placed in one of three play style categories. Attacking, Support, or Defense. I can’t go over every single weapon in the game in this article as it would take far too long. But the gist of it is that some weapons are geared more toward attacking opponents, and taking them out. Other weapons are suited more toward backing up the rest of the team so that other members can get to the objective. Then there are the ones geared toward hanging back, and providing cover while also defending their position. Depending on the map, and mode being played you may be the type to change your load out, and style.
Your Sub Weapon is also important. There are a few categories. The first are the bombs. These are more or less the water grenades of the game. Bombs cover fairly large areas in ink, and they also dole out massive damage. Some of them like the Suction Bomb can be stuck to walls. Others like the Auto Bomb follow people around for a while before exploding. Others like the Ink Mine are obfuscated until a moment before they go off.
There are also gadgets. The Sprinkler can lay down ink continuously until it is destroyed, or you throw one down in a new spot, or until you die. One cool thing about that is you can try to hide one in a hard to reach place so that you can be laying down ink while taking care of an opponent, or trying to claim an objective. Others like the Squid Beacon will give your teammates a place to jump to. Really handy when you need to get them closer to the goal at hand quickly. Point Sensors are a great utility to tag enemies, and have their locations temporarily shown on the map.
Again, each of these kits tries to give you a versatile combination of items that complement each other. How do you get these kits? The same way you get your gear, and that’s through the shops. There are four of them. A shirt shop, a footwear shop, a headwear shop, and the weapon store.
The shops are opened up to you once you reach level 4. You raise your level by playing in the game’s online modes. There are really only two major level moments you need to hit, and that’s so you can experience everything. The first of course is level 4. Getting to level 4 allows you to go into the shops where you can spend the points you earn winning, and losing battles online. The second is level 10. If you want to play the ranked modes you’ll need to play online regularly until you reach that number. After that? Your level really won’t mean anything other than you’ve played a lot. Getting to level 30 will get you a Sea Snail every level upgrade from that point on. But beyond that it’s meaningless. So when you start out, don’t feel intimidated by seeing 35’s or 50’s in your matchups. It isn’t an indication of skill. In fact, it isn’t uncommon to see highly skilled players in the teens.

Of the shops, the one you’ll probably want to go to first is Ammo Knights. Here the fast talking Sheldon, will prattle on about the guns you can buy. It’s also the place where you can test your weapons out on dummies, and rafters. It’s nice because you can come here to see results of buffs or nerfs to weapons when Nintendo releases a new patch. You can also get a feel for a weapon before you decide to go ahead, and unlock it with hard-earned points. When I started playing I just went for every weapon I could afford after playing matches for hours at a time. And when any update brought along new weapons I was sure to buy those once I hit the appropriate level to use it. My reasoning was that I would have the option to use anything available, and I could worry about the other stuff later.
However, that might not necessarily be the best way to go about the shops because the clothing options do more than look cool. Each of the clothing options come with perks called Abilities. There are a wide variety of these, and can greatly help you in online matches. Not only do they have a perk on the clothing item, but there are an additional one, two, or three slots on the apparel for more.

As you play online, the clothing will level up at the end of each round. The amount will change depending on whether your team won or lost, as well as your performance during the round. When you fill the meter up you’ll randomly get another perk. There are two main types of Abilities: Unique, and Regular. Unique ones are only on specific types of clothing. These can not go into the additional perk slots which limits them to one slot on only a handful of possible clothing options. This is likely for balance.

Regular chunks however can be used in the sub perk slots, as well as appear in the main perk slot. Moreover, some of the fictional clothing brands have a better chance of randomly generating certain types of Regular chunks. It is possible to have pieces of apparel with the same ability in every slot on it as a result. And it isn’t uncommon to see players online with them. Be that as it may, it can take a long time to get perks on each slot, and some clothing items may only have one slot on them. You may ask yourself how it is that someone managed to get three slots, with the same ability in all three of them.
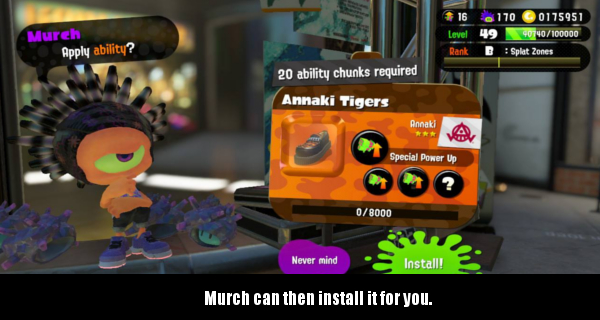
Enter Murch
Murch is the short Urchin I mentioned earlier, and he is key if you don’t want to leave what perks you end up with to chance. He can do a number of things for you, for a price. For starters, if you have any Sea Snails you can give one to him to re-roll your Abilities. You can also have him use a Sea Snail to add a perk slot to a clothing item that might have only one or two by default. The easiest way to gain Sea Snails are to take part in Splatfest events when they occur. These are 24 hour events where players pick a side (ie: Ketchup Vs. Mustard), and compete in Turf War matches. These matches take place in Normal or Pro varieties. Normal being a bit better for those whom want to play with friends (assuming you’ve chosen the same side) as it has the option to do so. Pro being the better way to go if you want to gain a higher individual score, and get a chance to be entered in random 10x or 100x matches with more potential rewards. At the end of the Splatfest you’re given a number of Sea Snails based on whether your side won or lost, and what Splatfest rank you hit (from Fanboy or Fangirl to King or Queen).

Another thing Murch can do is scrub the Abilities from an article of clothing for 20,000 points. When you do this, the chunks that were on the item go into a sub menu where they can be used later if you have enough of them. During Splatfests you’re given a T-Shirt. Often times the game will announce the Splatfest a week before it takes place. If you choose a side immediately you can begin filling, and scrubbing slots all week-long, farming chunks. Murch will scrub Splatfest T-Shirts for only 2,000 points. So you can get a head start on saving up those chunks.

Here’s where it gets really interesting though because once you have 10 of any given ability chunk you can assign it to a perk slot on a clothing item. So you can then begin to choose what perks you want, and base them around your kit of choice. If you want the same ability across three slots, it can also be done however, stacking an ability costs more. You’ll have to have 10 for the first slot, 20 for the second, and 30 for the third. If the main ability on the clothing item is a regular one, that is up to four of the same perk across the item. This is where taking part in Splatfests can help you immensely. Of course it should be noted each one you stack is a bit less potent than the last, so on some level there are diminishing returns. Still, having a hat with four run speeds, a shirt with four run speeds, and a pair of shoes with four run speeds will net a noticeable run speed difference.
You can also pay Murch to order a competitor’s gear by choosing to when looking at their layout in the plaza. It costs more than finding it in one of the shops, and takes 24 hours per order though you can order up to three at once. But if it’s one of the rarer items that never seems to show up when you go into a shop it might help. Do note, that the perks on the clothes aren’t guaranteed to come along with it though. And while I’m not covering it here, do know that playing the cooperative Salmon Run mode (When it cycles on) can gain you some costume options, and perks as well.

The main mode of the game of course is Turf War. As you likely know by now the goal is to paint a map your team’s color while the other team attempts to do the same. You’ll run into skirmishes almost instantly, killing each other so that you can gain ground while opponents are spawning. While it’s generally considered the game’s casual mode, it can still be rather cutthroat. This is a mode you’ll actually want to play a lot of to practice the mechanics, as well as see which of the game’s massive selection of weapons best suits your play style. You can also join up with friends, though if they’re in a full game you’ll be waiting for it to end until it lets you do so.
The game cycles its maps, and ranked modes every couple of hours. While it can be annoying to be on the same two maps for a while, it does negate the voting fights that break out in other games that, ironically, often end up going between one or two fan favorites. So this solution forces everyone to play every map eventually.

Anyway, Turf War is a great means for both casual, and competitive players. If you’re not particularly great at fragging opponents like an Unreal Tournament fiend, you can focus on painting. Pressing the X button pulls up the map at any time, and is a great tool in every mode. Pressing it again, will make it disappear. While it is up, you can see where your three teammates are at any time, and then jump to them if it looks like they’ll need backup. It also lets you see any Beacons a team member may have placed, as well as any enemies that may have been spotted. The obvious sight will be what ink is splattered where. You can see areas that haven’t been painted yet. You can see lone splashes of enemy ink surrounded by yours. This might give an indication that an enemy is planning an ambush.
Along the top you can also see what weapons enemies have. As you play more over time you’ll get used to seeing how these function. Knowing an enemy is wielding a Splatbrella means you’ll be better suited trying to find a place to flank from the side. This way they can’t just shield themselves. Likewise you can see what your teammates are using, and try to modify your tactics around their strengths to help win. Maybe you notice you’ve chosen a sniper class weapon, but the random teammates all have Dualies. Try finding a point where you can cover them from the left, right, and behind as they rush to the center of the map to paint.

A lot of skills, and techniques from other games can help you in Splatoon 2 as well. Map control is a universal skill. If you know a map like the back of your hand you can better anticipate where enemies will show up, because you’ll know the most common routes. You’ll know what spot gives the best advantages, and know to help your team hold it. Also, it’s easy to forget you have a sub weapon, and a special move or weapon. Remember as you get frags, and ink turf, you’ll fill your meter. Many of the specials have a variety of uses. You can use the bubble blower to shield your teammates, or you can just blow up your bubbles to take lives or turf. The same can be said of the sub weapons. Going back to controlling a map, as I said earlier you may want to hide a sprinkler on a ceiling or sneak a Beacon deep in enemy territory.
While Turf War may only count painted floors toward your score, don’t discount inking a wall to get to higher ground. You can swim up walls, and you can even use that fact for some stealthy maneuvers. Keep in mind too, that if you swim quickly you’ll leave ripples that an astute enemy may spot. But if you move very slowly, barely pushing that control stick you won’t. You’ll also barely make a sound. If you’re wearing clothes with the Ninja Squid ability on them, you won’t make a sound making surprise attacks, and escaping some assaults a little more manageable. Don’t discount the saying “Run away, and live to fight another day.”. Sometimes you’ll find yourself in 3 on 1 firefights, you simply will not win. Pulling up the map, and jumping back to spawn can allow you to regroup with your team mates as they spawn so you can try to regain composure.

When you reach Rank 10 you’ll be able to play the Ranked modes. These focus far less on inking the map, but keep in mind it’s still beneficial. You can move faster in your own ink, so always keep that in mind. There are four Ranked modes. Splat Zones, Tower Control, Rainmaker, and Clam Blitz.
Splat Zones is a microcosm of Turf War. Instead of trying to make the entire map your color, your team must control one or two tiny areas of the map until your counter hits zero. If the other team takes that control, a cool down timer gets placed on your team that has to count down before the main timer continues when you take it back. It’s a lot more important to work together here because these spots will be a non-stop hot spot the entire game. At least two of you should be on or next to the area at all times. But this is easier said than done. If you’re wiped out, the four of you are going to be at a massive disadvantage when trying to take it back. There are a variety of strategies a team can take. Do you all hold the line? This may work best if the enemy team rushes you, but they can also try to flank you. Do you have one person distract the enemy by running toward their end of the map so the others can take it? They may not take the bait. Paying attention to what people have chosen can really help you plan accordingly.
Tower Control is a push cart mode where both sides run to the center to take control of the tower. Once upon the tower it will move into enemy territory, and if unopposed will eventually land near the enemy spawn for a win. Someone on the team has to be on the tower for it to move. Over the months I’ve seen several impressive strategies from random teammates, as well as enemy teams. Often they’ve involved creative exploitations of sub weapons. Putting shower curtains on the tower as a shield. Booby trapping the tower with an ink mine. Putting Beacons on or near the tower for team mates to take it. Some teams have had their entire squad on or next to the tower, attempting to bum rush the opposing side. Others have sent one lone combatant out on the tower while lying in wait to ambush the enemy if they killed them, and claimed it for themselves. Again, knowing the map will help you plan strategies immensely.

Rainmaker is also a push cart mode except that instead of a tower, one person on one team can take control of the fabled Rainmaker. Which is kind of like the BFG of Splatoon. It can deal massive damage, as the wielder can shoot powerful ranged attacks. Of course there’s also a big target on their back, as opening the map reveals their location. So its imperative the cohorts of whomever holds it, gives them ample cover. If they die, they’ll drop it, and both sides will fight over the gun again. It’s important to have an attacker who can scout ahead of whomever is going to hold the weapon, and have defenders who can protect them from incoming flanks or surprises from behind. Again, knowing the map layout is key, and constantly checking the map for signs of reprisal is going to be important.
Clam Blitz is a weird hybrid of a football game, and a base attack/defense game. Each side has a net protected by a shield. The goal is to fill the enemy net with clams. In order to see the net, you have to destroy the shield with a football. You get the football by collecting enough clams or by having one spawn eventually. You can’t throw the football very far, so you have to get really close to the shield with it, and the football shows up on the map so resistance will be fierce. If you do break the defenses, your teammates will also be able to throw clams they’ve found into the net. You have to be fast because eventually the net will become shielded again.
Some strategies I’ve had luck with have been throwing clams to a teammate who has a lot of clams to spawn a football. But you want to wait until you’ve managed to infiltrate enemy territory, and you’re close enough to the shield. Otherwise you’re easily seen coming. Another is getting my own football while another player has one, causing confusion, and either going for the shield while they’re busy with them. Or by distracting them long enough for the teammate to break the shield with his.
Other times I’ve hung back, and tried to just defend our net with surprise flanks while my team tries to push into the enemy camp. You’d be amazed at how often both teams can have footballs going simultaneously. You can also try to throw the football from below or above the shield when the enemy team is standing guard in front of it. This isn’t always easy to pull off, especially on some maps like Camp Triggerfish where one can often see that strategy coming from a mile away. On the other hand you can often combine this strategy with others.

While I am by no means a professional grade Splatoon 2 player, I hope if you’re a newcomer, or a lapsed player some of this stuff can help you get up to speed. It’s a great game, with a growing community. There are over 8 million players so there are a ton of opportunities to improve. You can even play all of the modes privately with friends which makes for a great way to practice. As well as bring in other newcomers without intimidating them with veteran strangers. You should also strongly consider mastering the game’s motion controls. For some of you it might seem cumbersome, especially if you’re accustomed to twin stick shooting. The game lets you shut them off, and use a traditional twin stick scheme. But hear me out. Motion controls can be far more effective. Aiming is far smoother, especially when going after higher or lower targets. Even with them enabled you can still do snaps to the left or right with the right control stick. I generally use the joycons in a grip when playing. Some swear by the Nintendo Pro Controller, or an equivalent like the ones by third-party Power-A. It’s not quite as seamless as a high dpi mouse being used on a PC FPS game. But it’s far more responsive over a thumb stick in my experience.
I also recommend watching some tournament level players on Twitch or YouTube if you want to pick up pointers. ThatSrb2Dude, and Wadsm are two such players whose content has been a wealth of help in my own quest to do better. Some of the things I’ve talked about here, I’ve learned by watching them. So be sure to check out some of their content, and live streams if you get the chance. And of course, simply playing regularly will help you improve. Whether you’re looking to become a competitor, or you’re like me, and just simply want to be a better all around player. Hopefully something I’ve listed in all of this rambling has been of some value to you. Have fun inking, and until next time….. STAY FRESH!


